Appointments Management
The Appointments Management module allows both Requesters and Providers to schedule and manage appointments related to medical second-opinion cases.
Appointments help clarify case details, discuss recommendations, or coordinate communication between participants.
1. Purpose
Appointments serve as formal coordination points between the requester and the provider.
They ensure timely communication and structured follow-ups during the review process.
- Both Requesters and Providers can request or respond to appointments.
- Admins can view all appointments but cannot create or edit them.
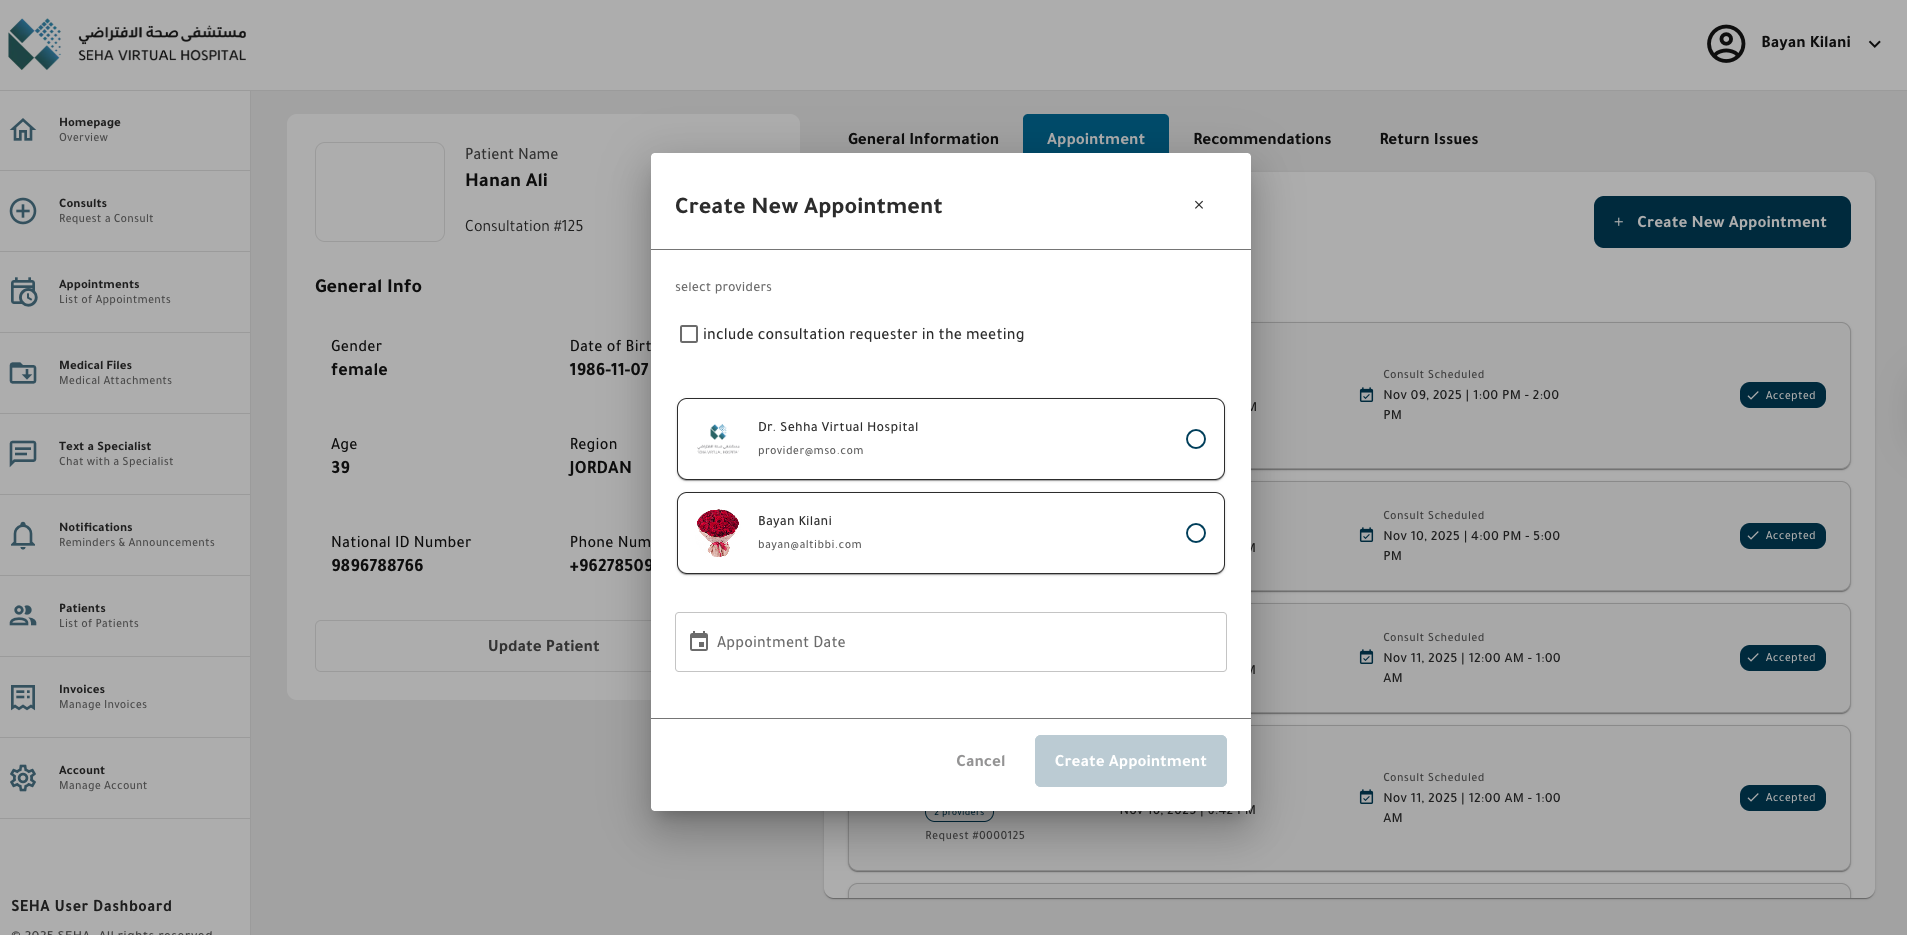
2. Creating an Appointment
An appointment can be created from within a specific case.
- Open the case from the Case List.
- Go to the Appointments tab.
- Click Request Appointment.
- Fill out the following details:
- Date and Time (required)
- Purpose / Description (optional)
- Click Send Request to submit the appointment proposal.
Once created:
- The other participant (provider or requester) receives an in-app and email notification.
- The appointment appears in both users’ Appointments lists.
3. Appointment Statuses
Each appointment has a defined status indicating its current stage in the process.
| Status | Description | Action By |
|---|---|---|
| Pending | Appointment has been created and is awaiting response. | Creator |
| Accepted | The other party accepted the appointment. | Receiver |
| Rejected | The creator or receiver canceled the appointment. | Either |
The appointment status automatically updates when a user accepts or rejects a request.
4. Responding to an Appointment
When a requester or provider receives an appointment request:
- Open the Appointments tab within the case.
- Review the proposed date, time, and purpose.
- Click:
- Accept to confirm participation, or
- Reject to decline.
Before the appointment’s scheduled time, only the Reject option is visible. The Accept button appears automatically 5 minutes before the appointment begins, allowing the user to confirm attendance. Accepted or rejected appointments trigger immediate notifications for the other party.
5. Viewing Appointments
Users can view and manage their appointments in two ways:
5.1 Case-Based View
- Open the case → Appointments tab.
- View all related appointments for that specific case, including status, date, and requester.
5.2 Global View
- From the side menu, go to Appointments → My Appointments.
- The list shows all appointments across cases, with columns for:
- Case ID
- Consultation ID
- Provider
- Date and time
- Status
- Created At
- Actions
- Filters are available by ID, Consultation ID, Provider, status or date.
7. Notifications
- Both parties receive notifications for appointment creation.
8. Permissions Summary
| Action | Requester | Provider | Admin |
|---|---|---|---|
| Create Appointment | ✅ | ✅ | ✅ |
| Accept / Reject Appointment | ✅ | ✅ | 🔒 |
| Reject Appointment | ✅ | ✅ | 🔒 |
| View Case-Based Appointments | ✅ | ✅ | ✅ |
| View Global Appointment List | ✅ | ✅ | ✅ |
9. Example Interfaces

Note:
Appointments are linked to specific cases and are only accessible by the requester and provider assigned to that case.
Admins can view appointments for oversight but cannot modify them.