Provider Registration and Profile Management
The Provider Registration process allows medical experts to create their own accounts through the public registration form. Providers must complete all required fields accurately to ensure successful registration and account activation.
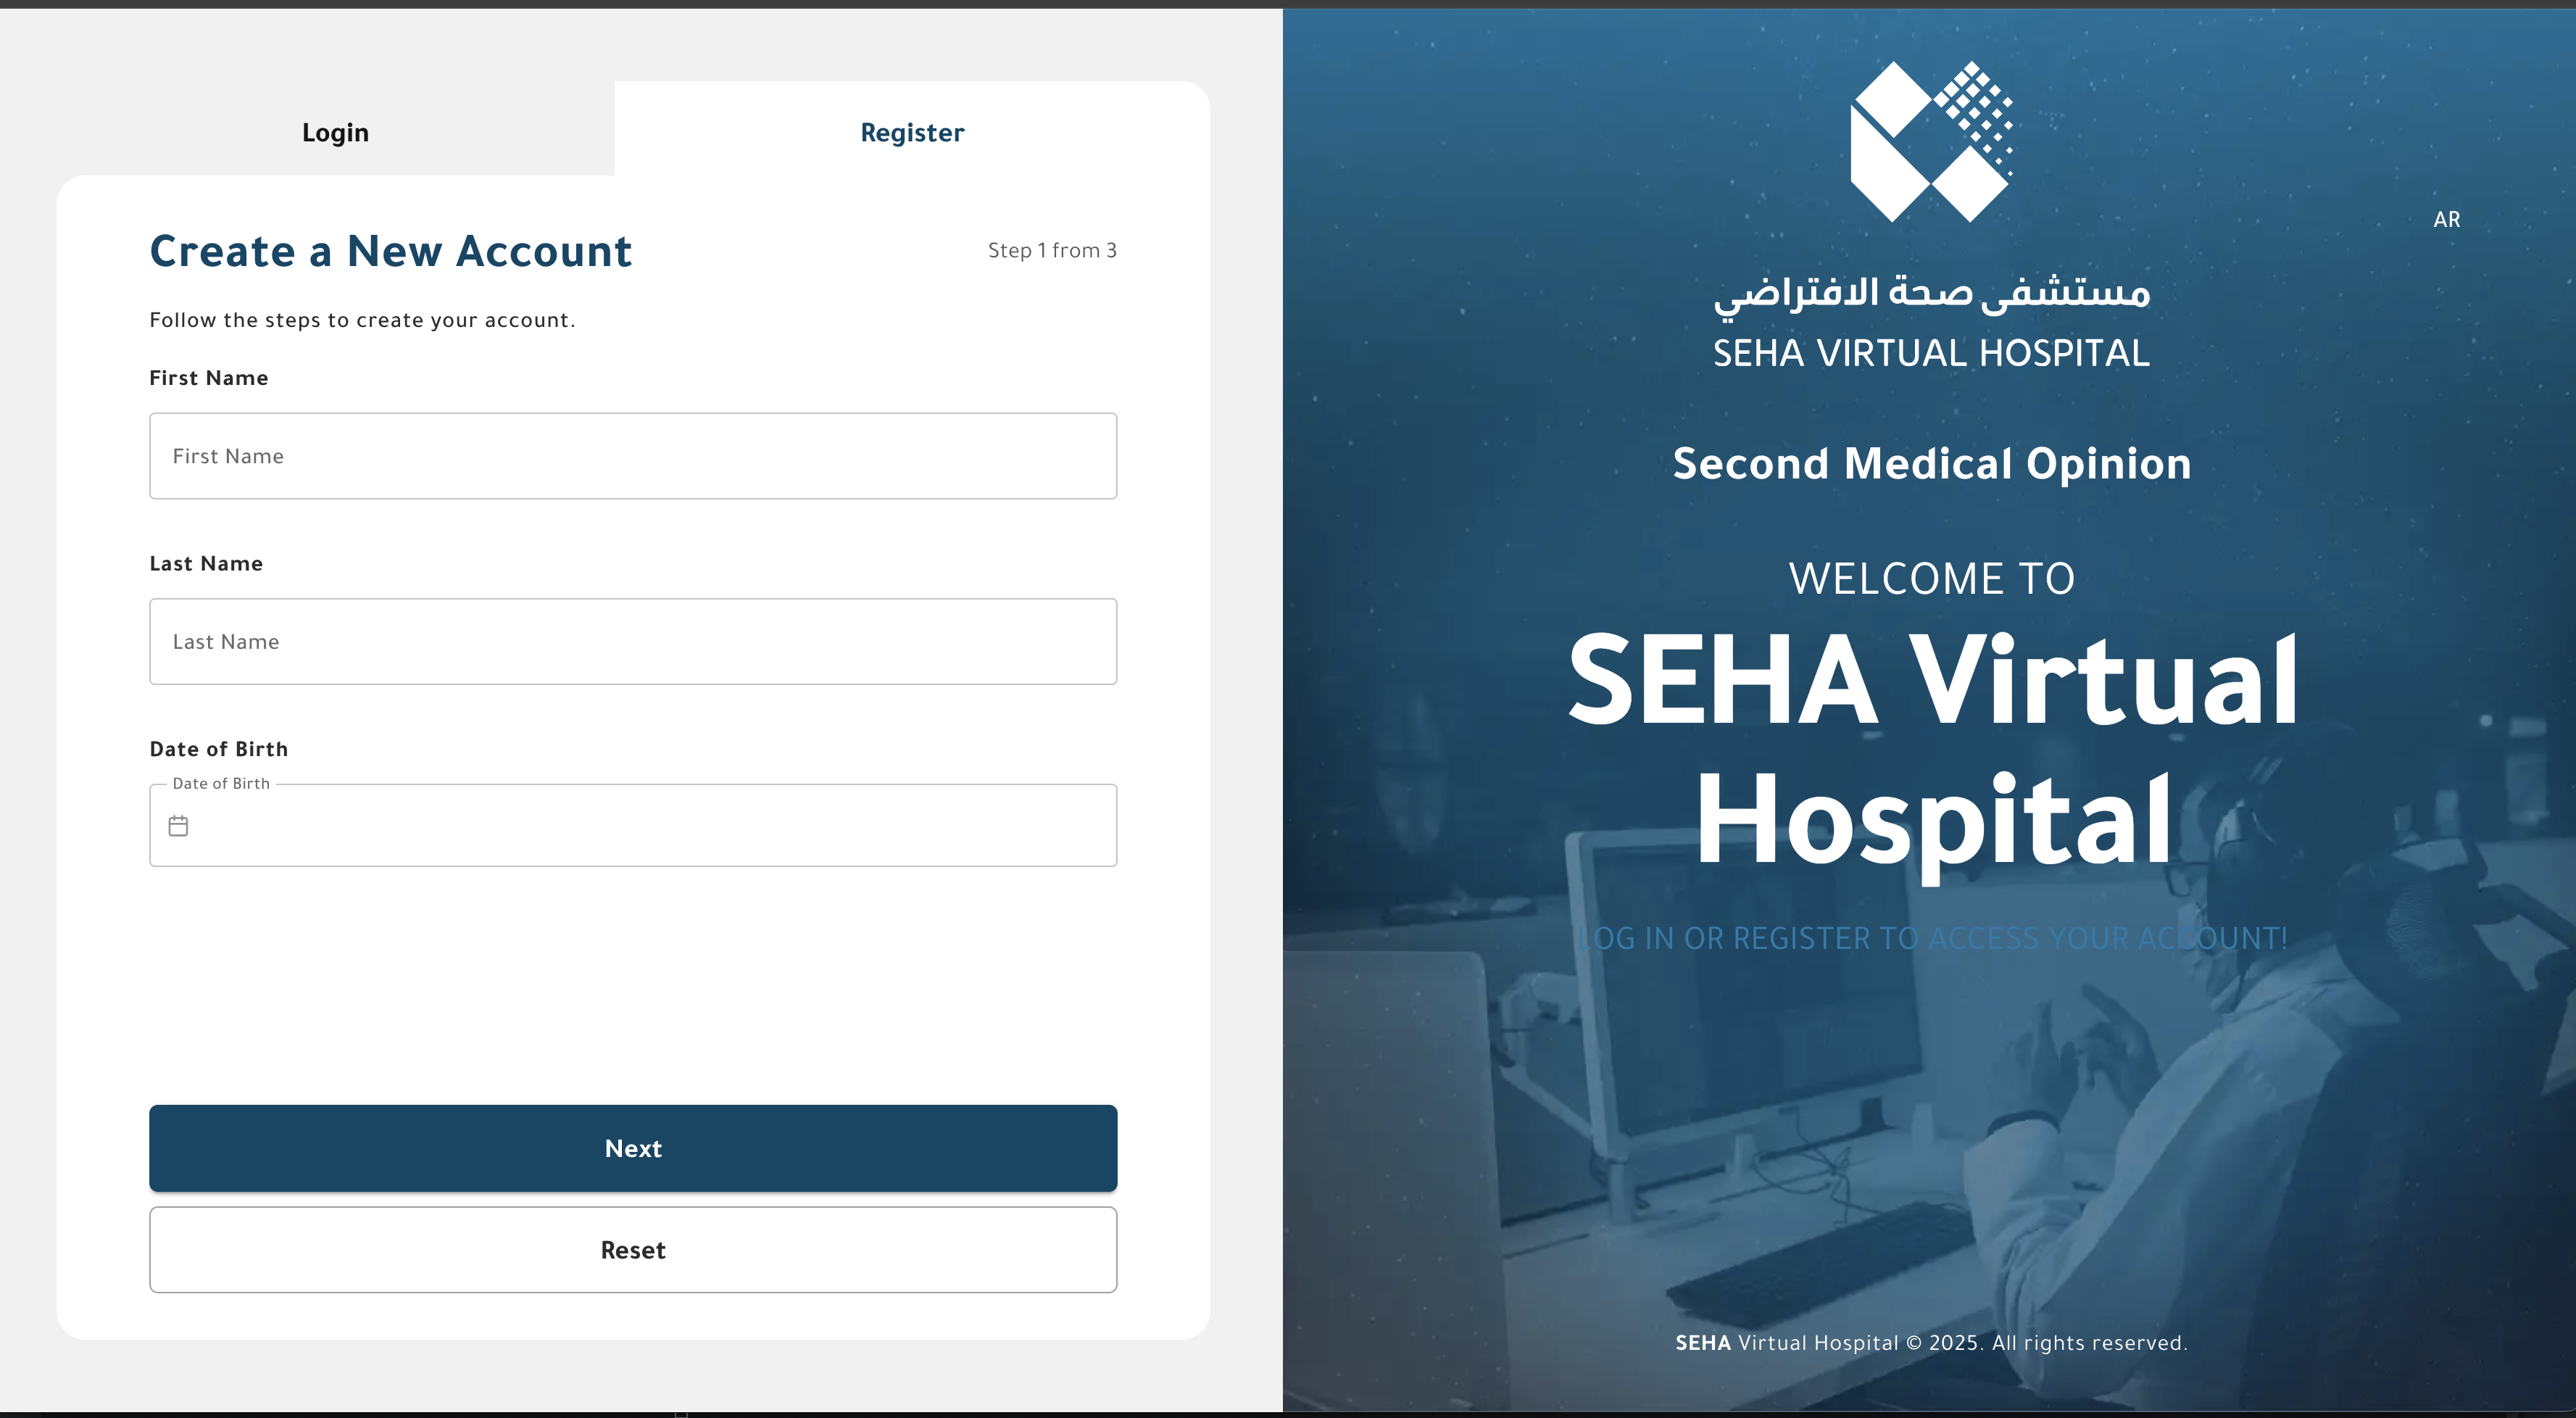
Provider Registration Steps
- On the Login page, click the Register tab.
- From the Account Type dropdown menu, select Provider.
- The Provider Registration Form will appear.
Registration Form Fields
| Field | Required | Description |
|---|---|---|
| First Name | ✅ | Provider’s first name. |
| Last Name | ✅ | Provider’s last name. |
| Date of Birth | ✅ | Used for identity verification and profile accuracy. |
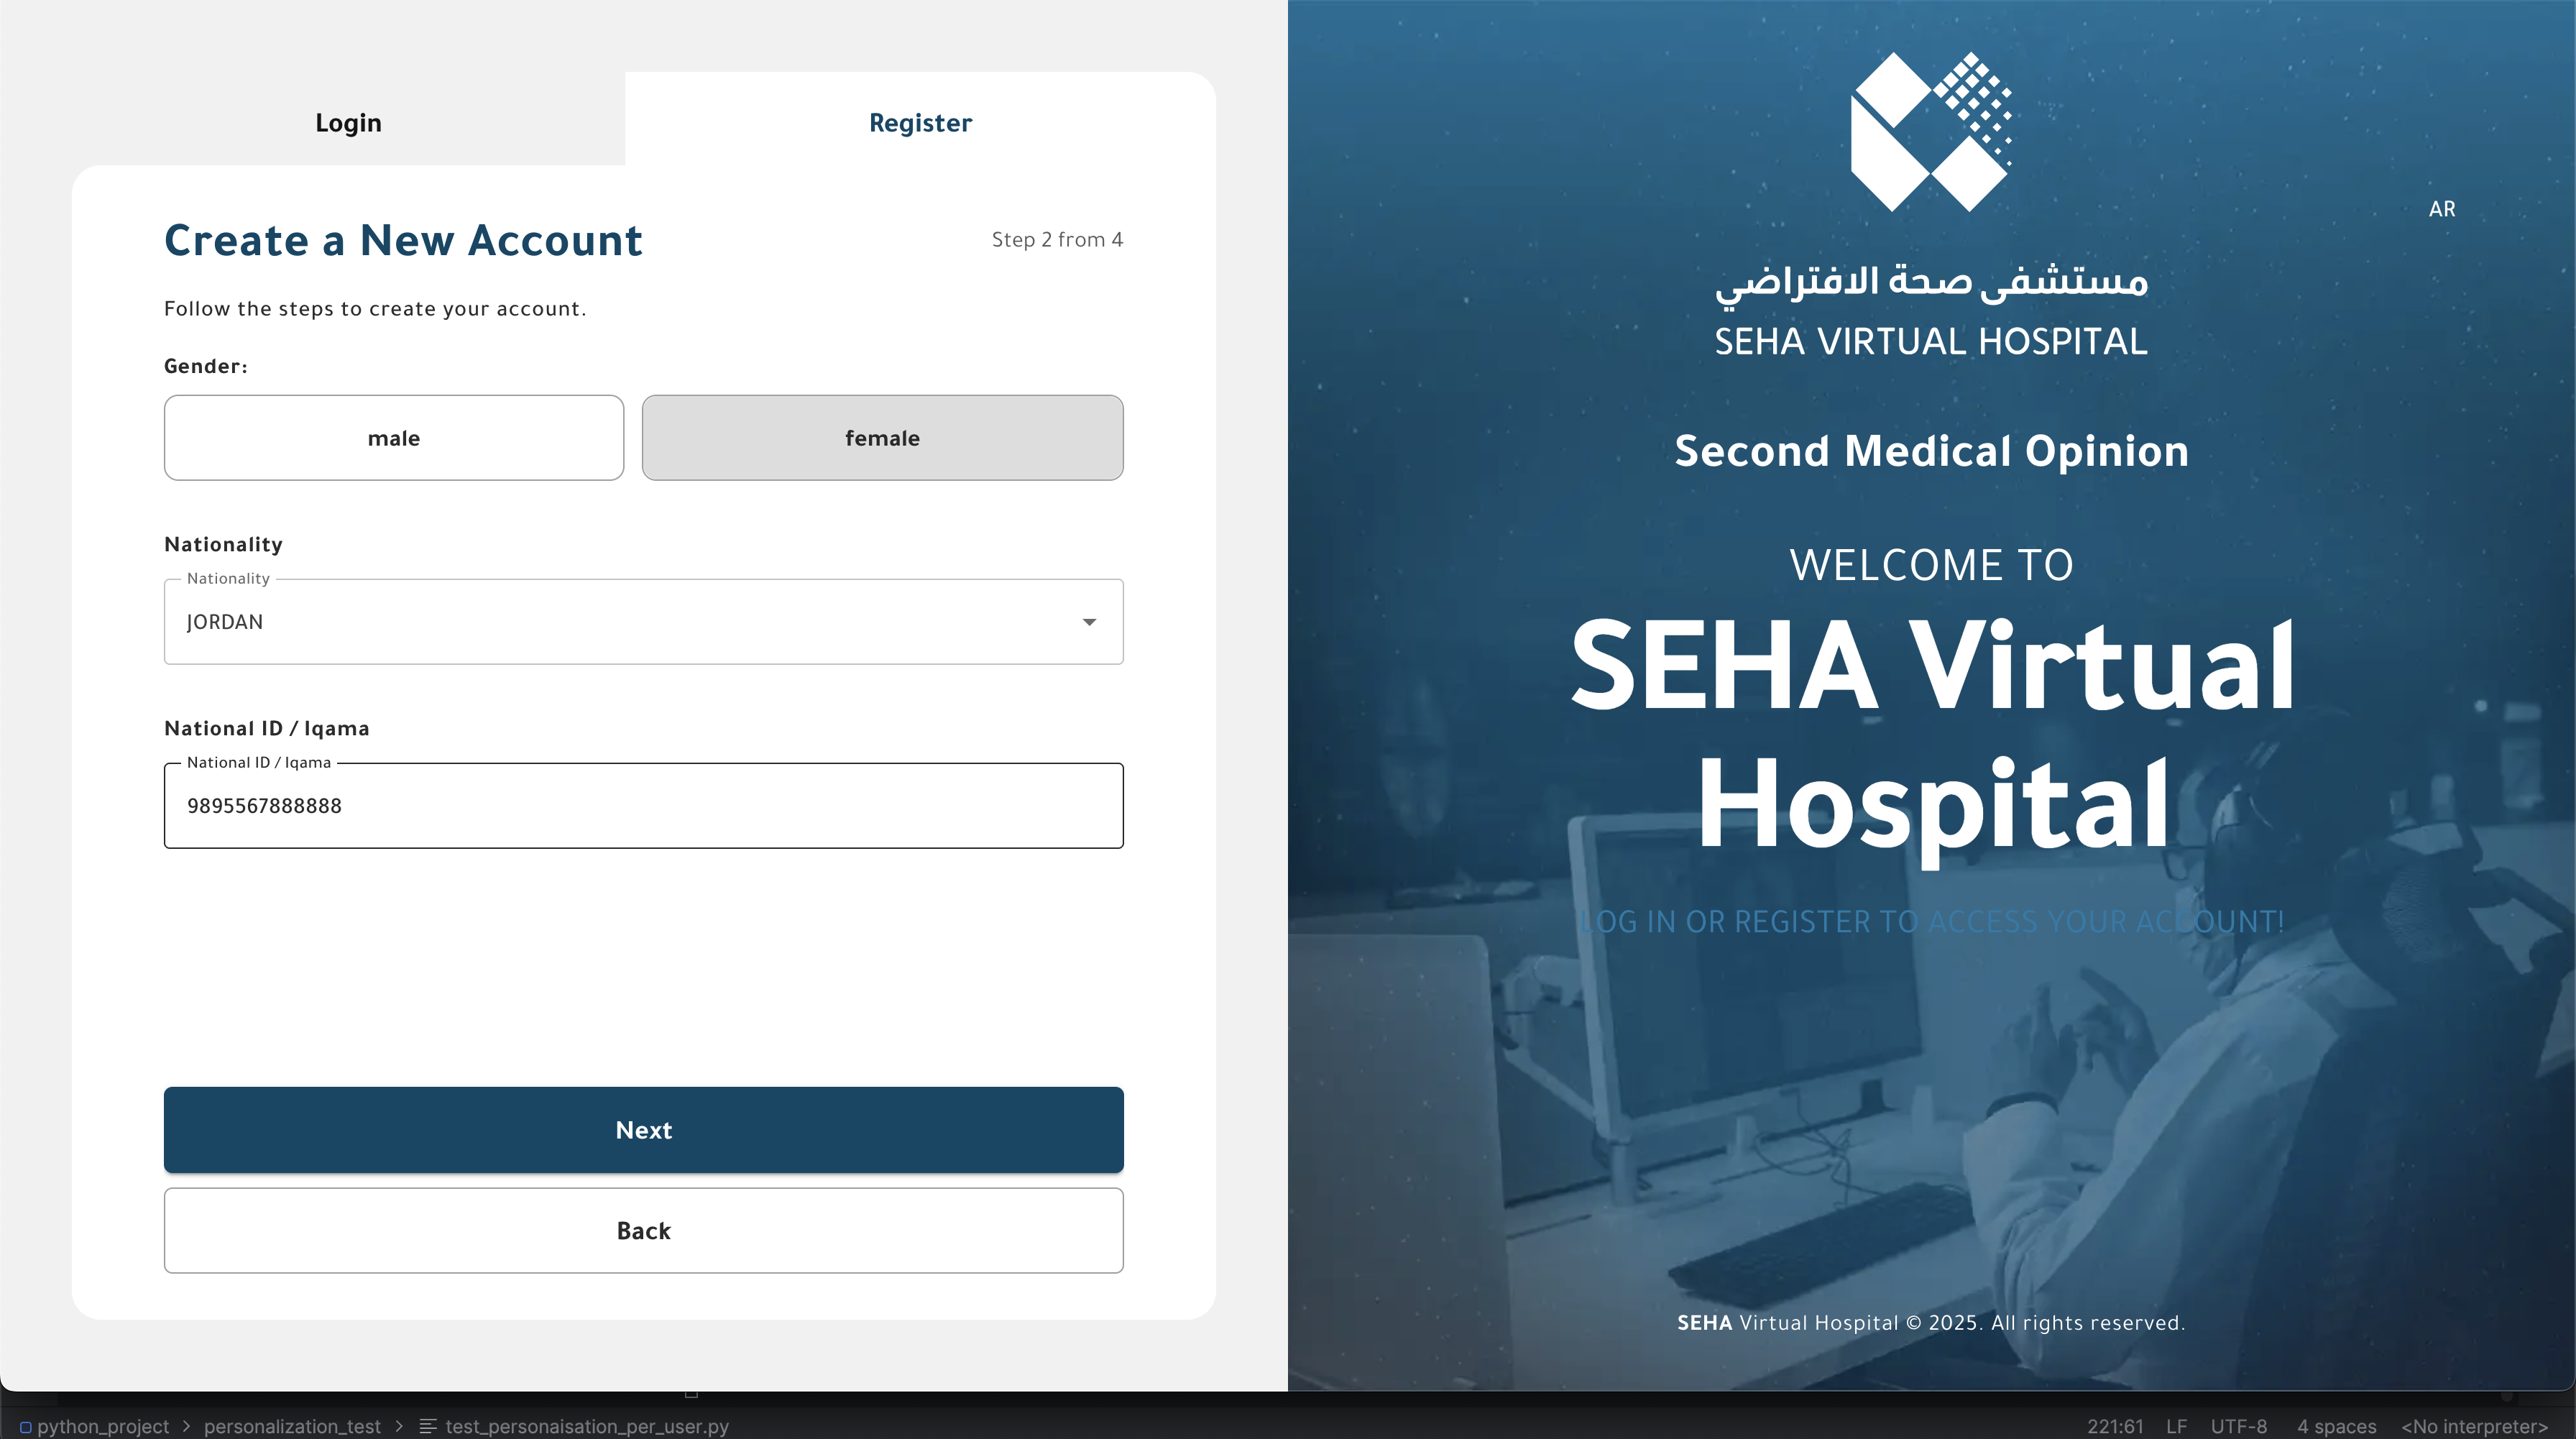
| Gender | Optional | Select from available options (Male / Female / Prefer not to say). |
| Nationality | ✅ | Provider’s country of nationality. |
| National ID / Iqama | ✅ | Required for Saudi-based identification or residency verification. |
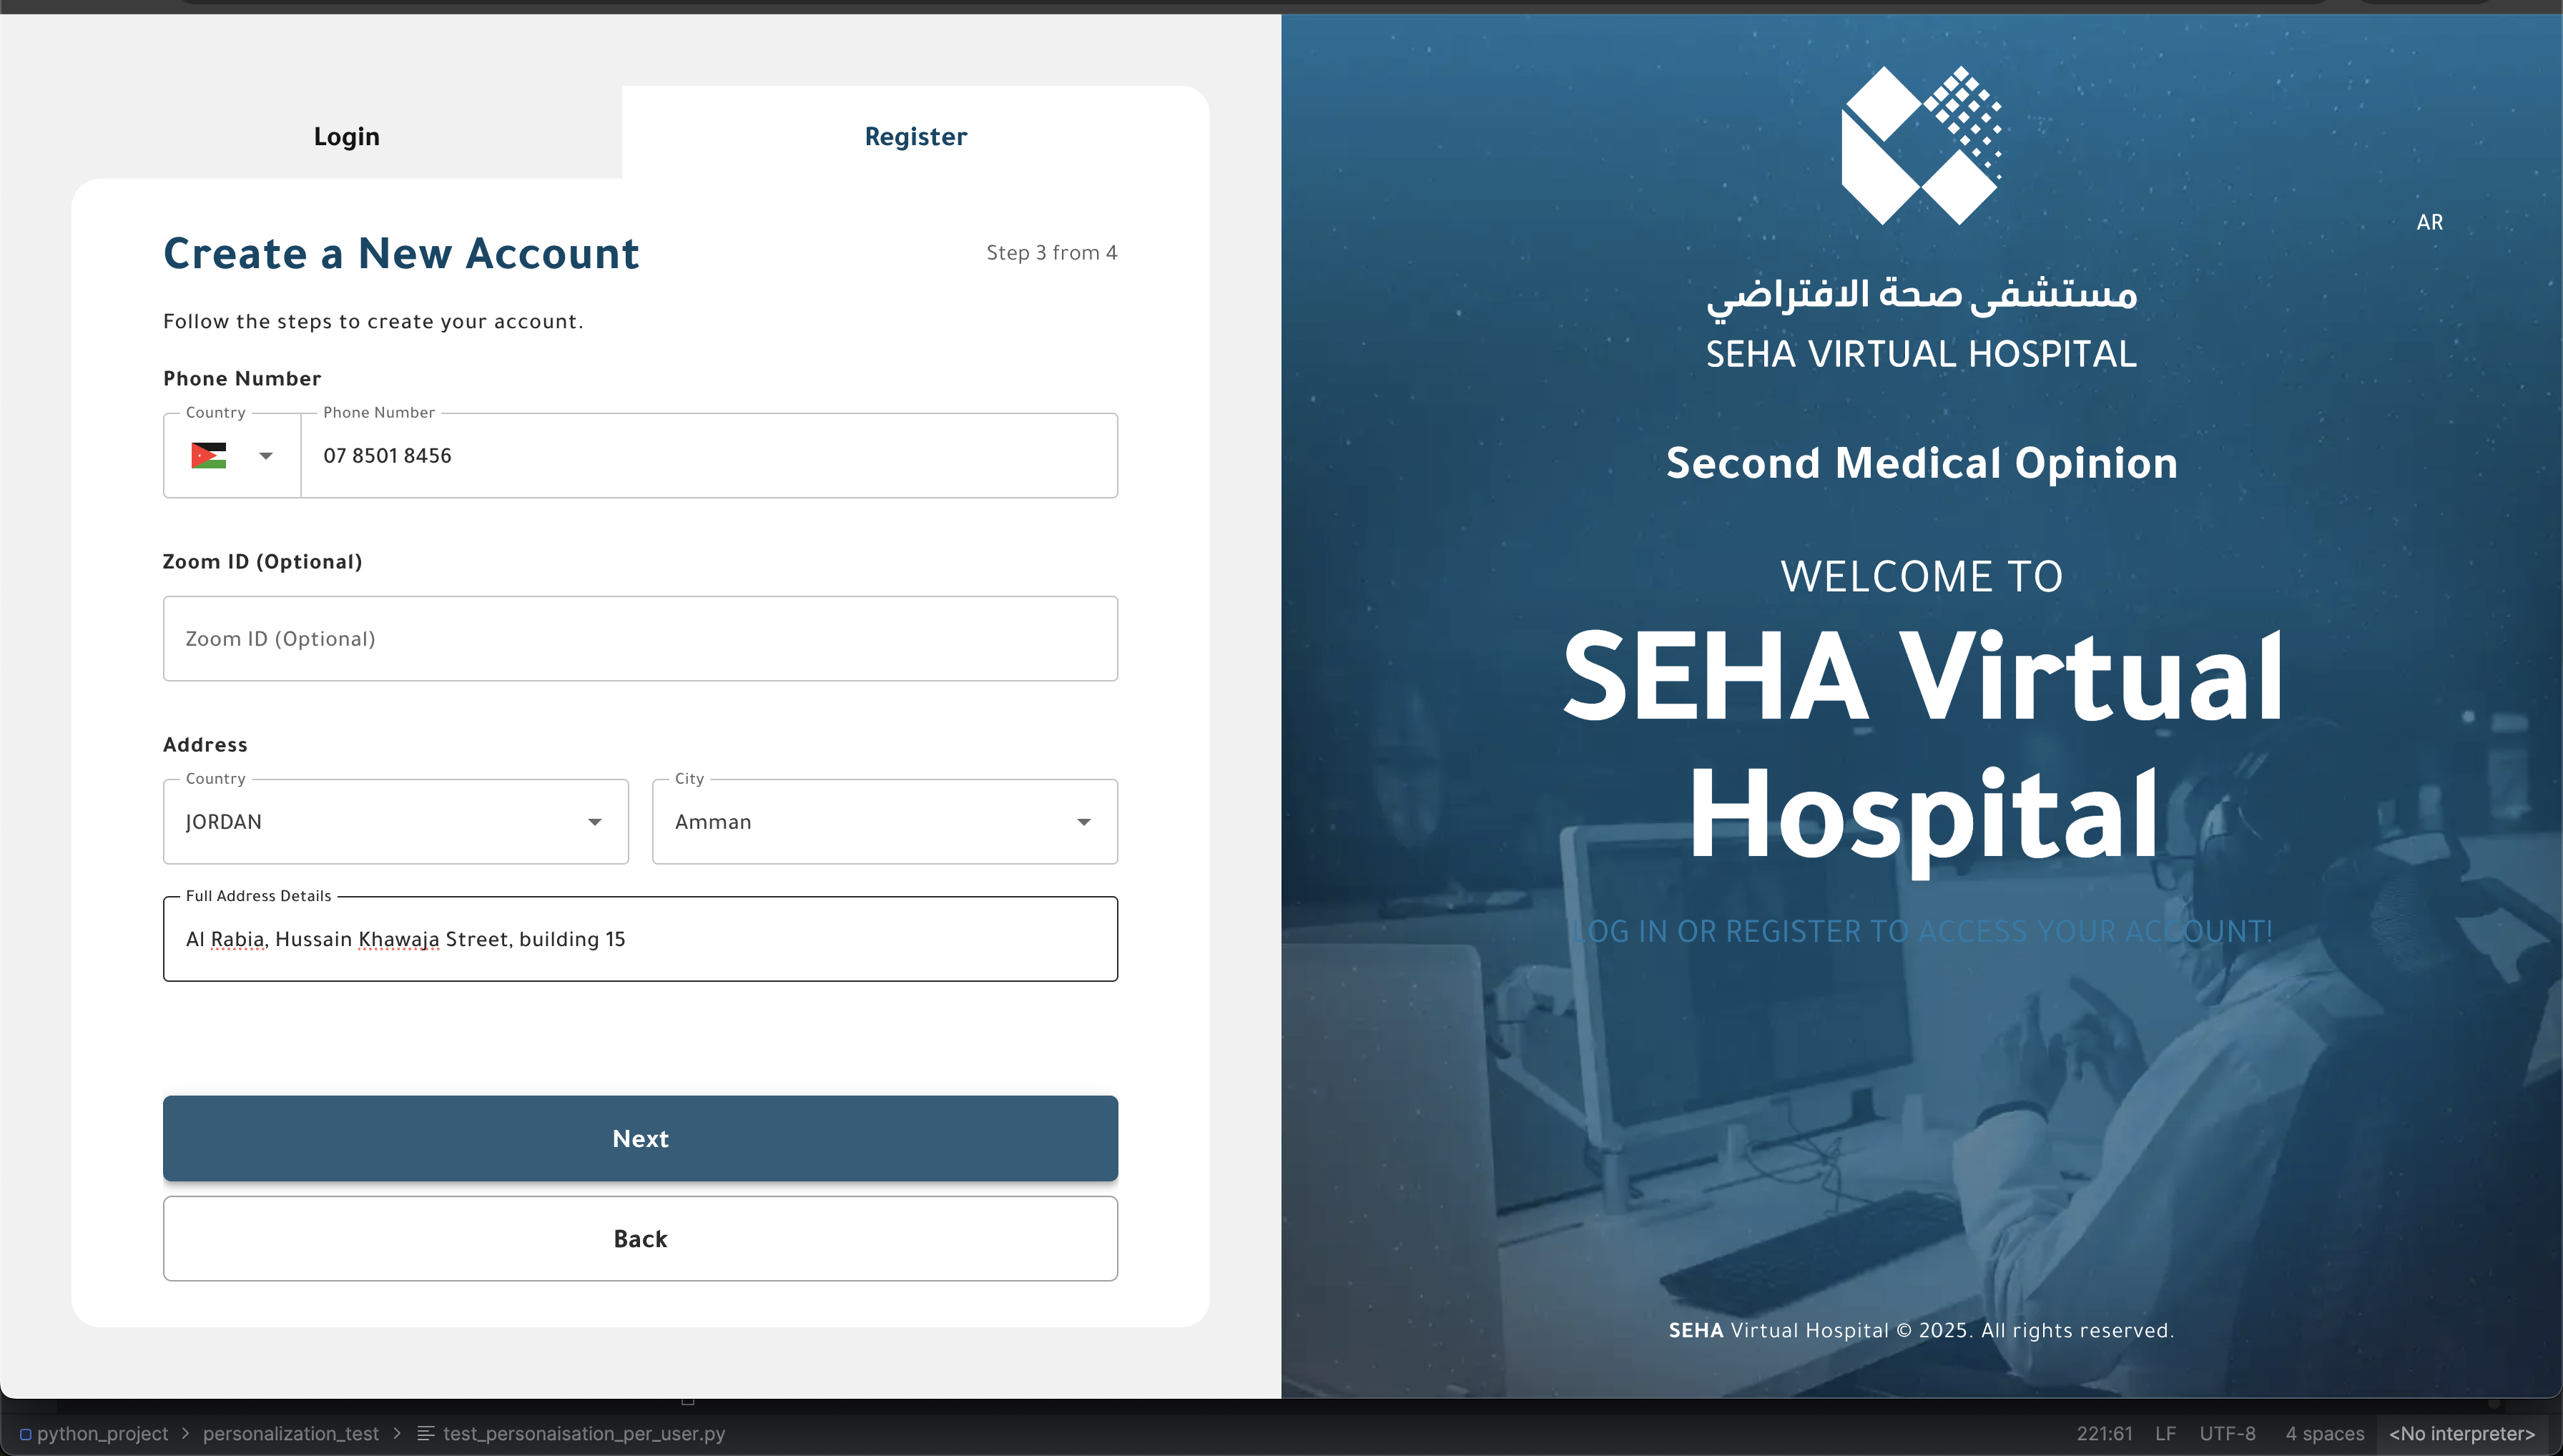
| Phone Number | Optional | For contact and appointment purposes. |
| Zoom ID | Optional | Used for remote consultation sessions. |
| Address | Optional | Main place of practice or residence. |
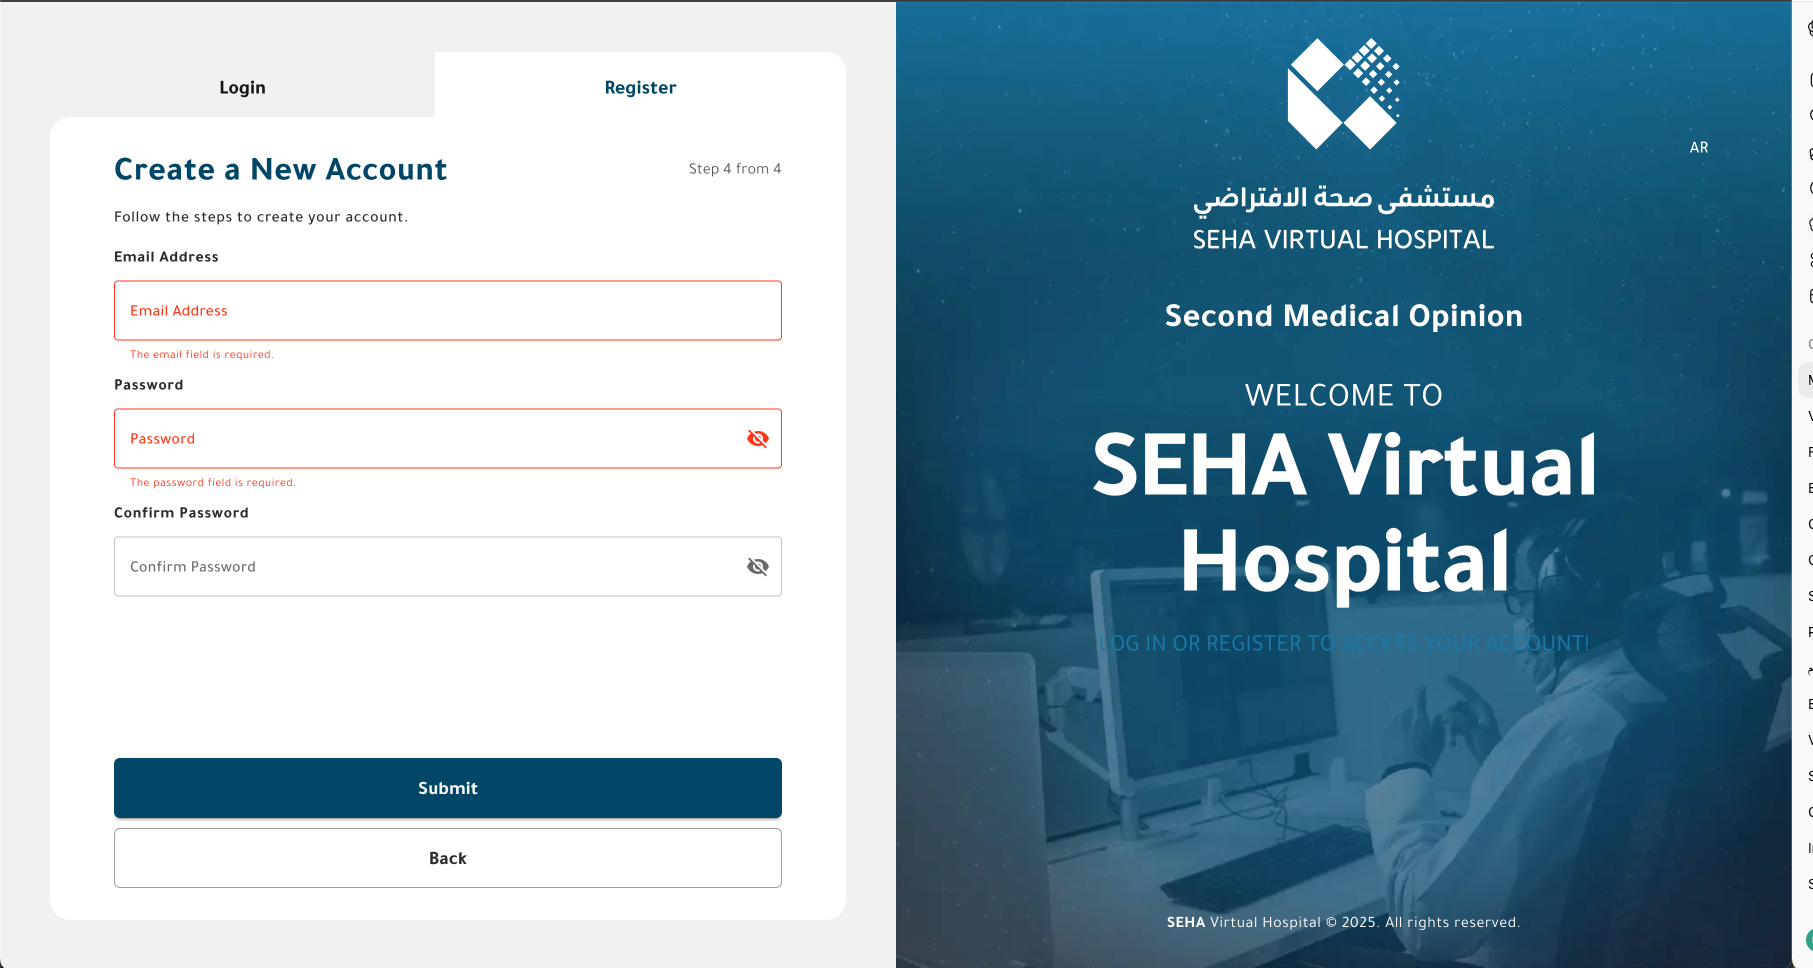
| ✅ | Used as the provider’s username and for account verification. | |
| Password | ✅ | Must meet system password complexity requirements. |
| Confirm Password | ✅ | Must match the entered password. |
After filling in the required fields, click Submit to complete registration.
Example Interface

Account Activation and Verification
- After successful registration, a verification email is sent to the provider’s registered email address.
- The provider must click the verification link in the email to activate the account.
- Providers can request resending the verification email only once if they did not receive it.
- If a provider changes their email address, a new verification email is automatically sent to confirm the updated email before changes take effect.
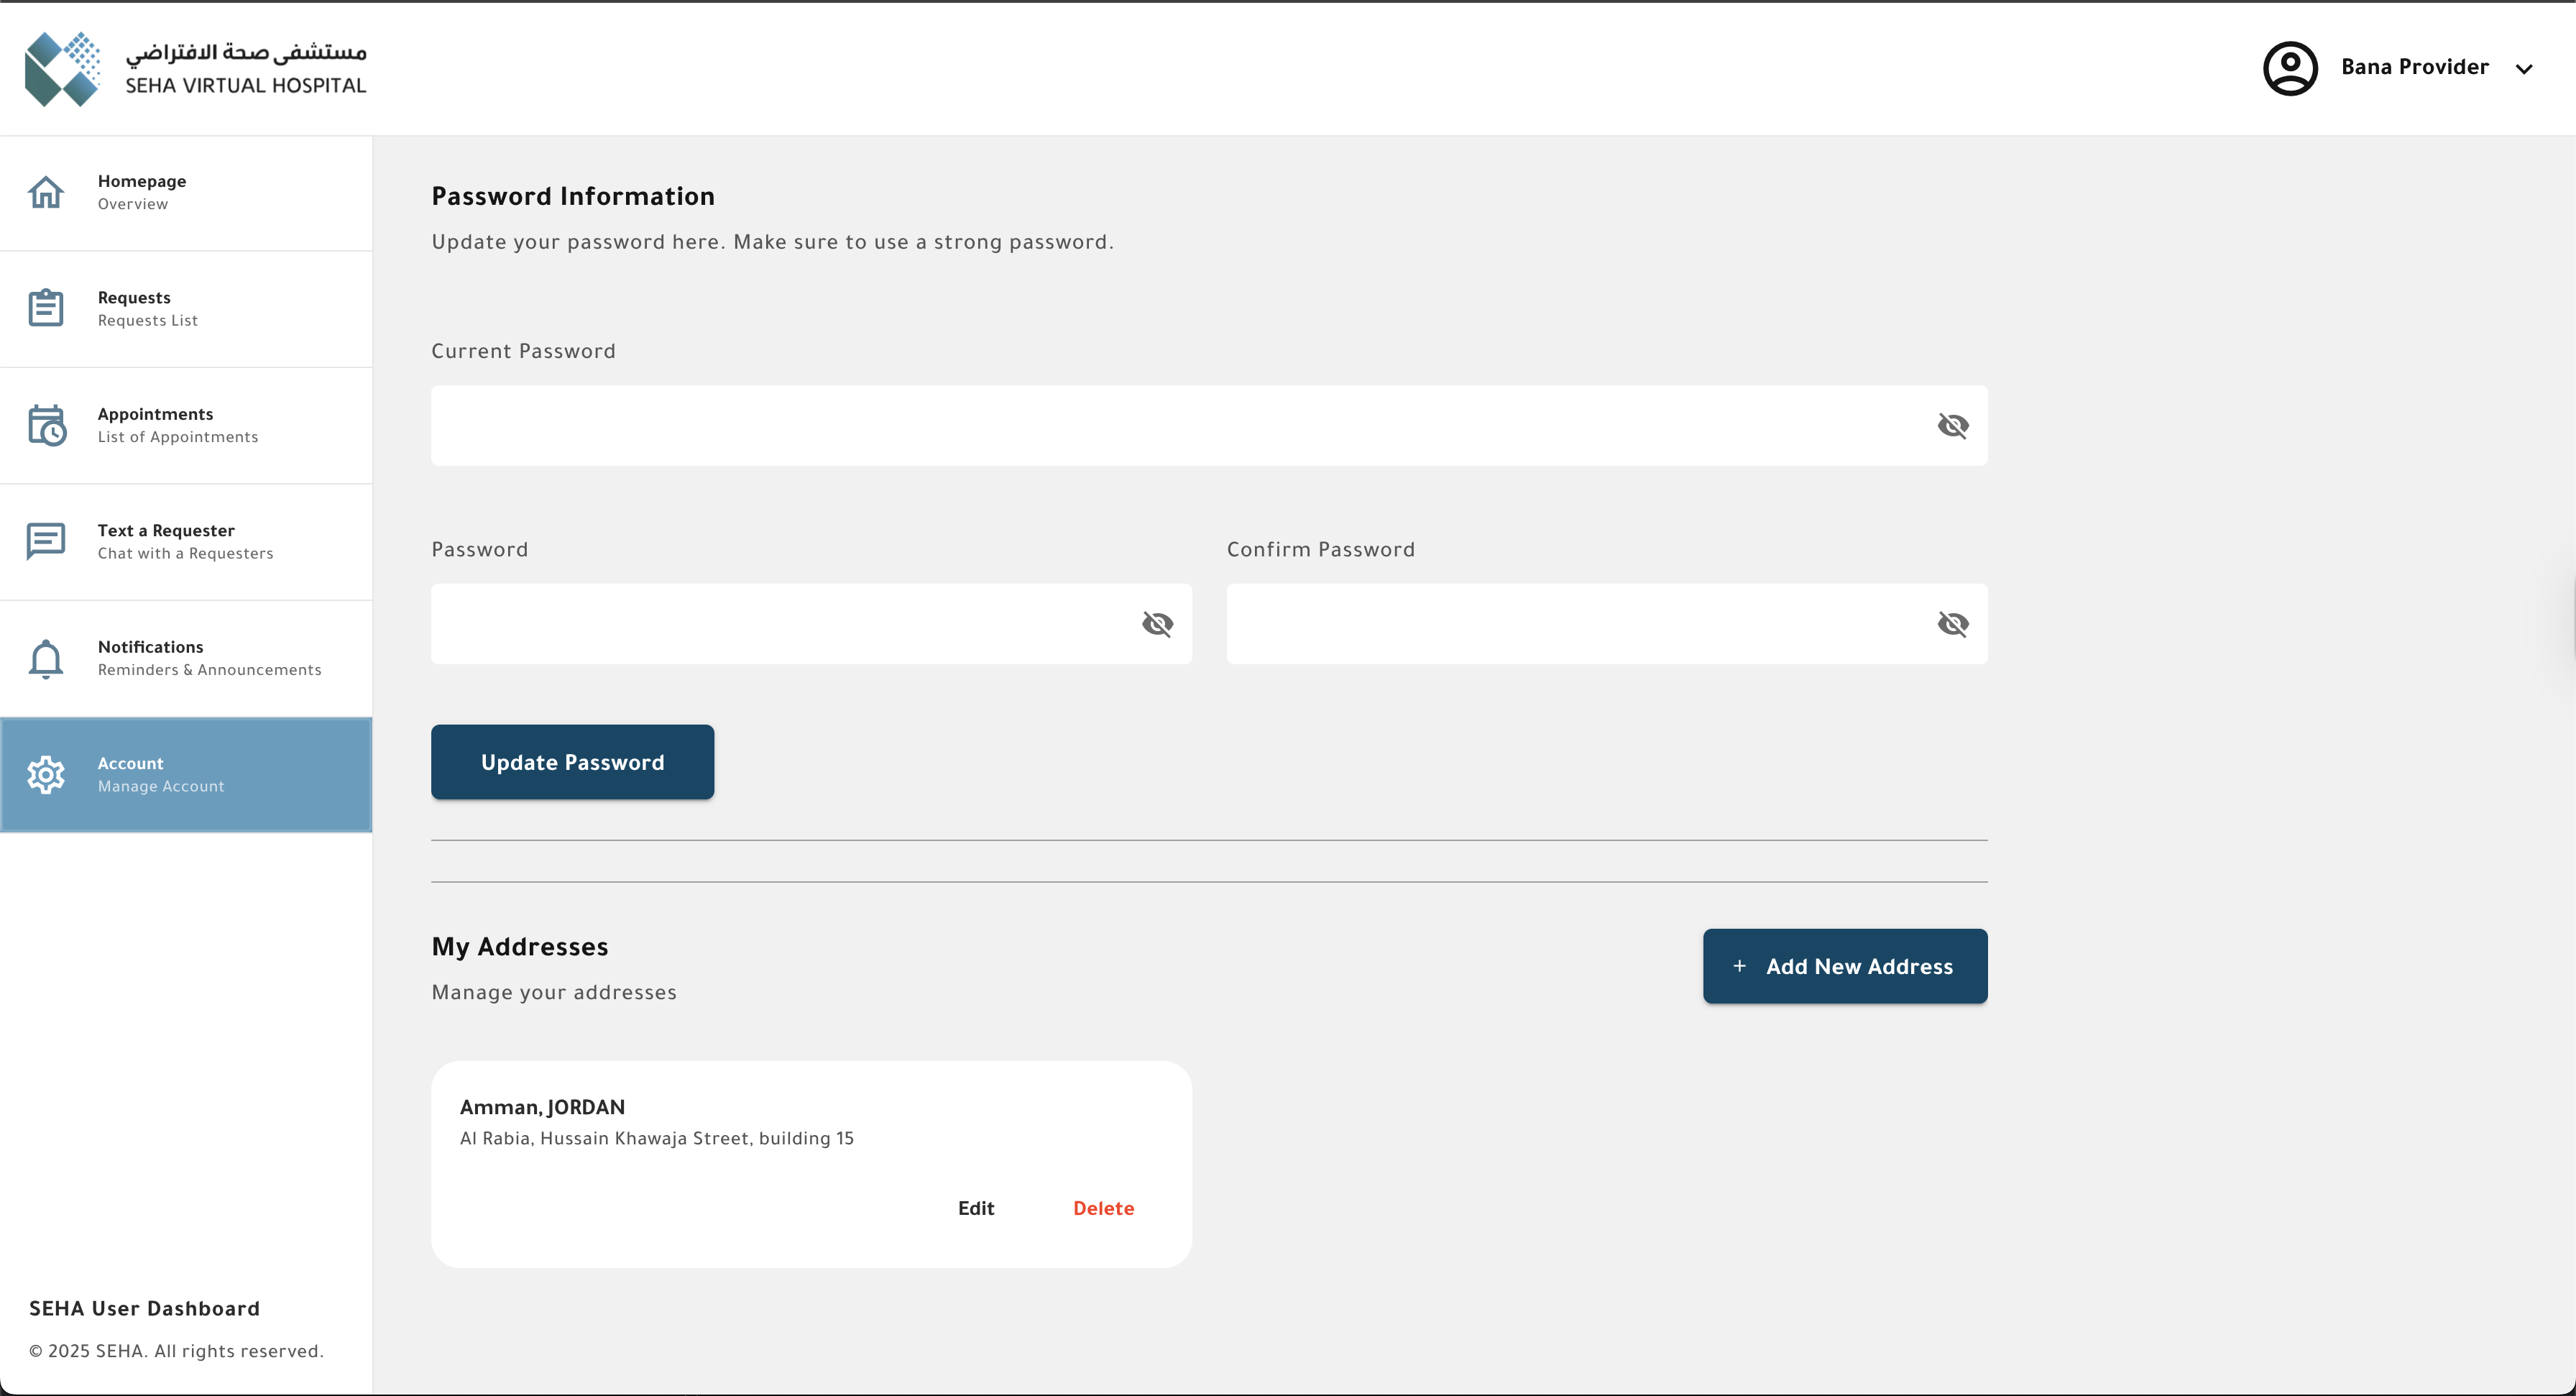
Managing Provider Account
After account activation, the provider can log in and manage their account details from the Account page.
1. Upload Profile Image
- Providers can upload or update their profile picture at any time.
- The image must meet system format and size requirements.
2. Update Personal Information
Providers can edit the following fields from their profile:
- Date of Birth
- Phone Number
- Email Address (changing email triggers a new verification)
- Gender
3. Change Password
- Providers can change their password at any time from the Security Settings section.
- The new password must meet the minimum complexity rules.
4. Manage Addresses
- Providers can add multiple addresses to their profile.
- Each address includes:
- Country
- City
- Full Address Details
- The latest saved address appears as the default location for appointments or correspondence.
Example Interface

Note:
Provider accounts do not require external (governmental) validation. Once the email verification is complete, the account becomes active and the provider can start receiving case assignments from the Admin.